Since we started planning our upper level renovation almost a year ago I've been wanting to do something new to the existing fireplace. Having never done trim or finish work of any kind, I could just picture everything turning out amateurish. That probably led to my hesitation starting this project. Eventually, Piper and I were finally sick of staring at a dirty old fireplace with our tv setup right in the middle of our living room; it made our entire space feel unfinished.
Lately I've been motivated to get things done aroound the house because once lil' Zbear starts walking everywhere all bets are off. She's already starting to become mobile with her military-style belly crawl so there's this unknown deadline for some of our major renovation ideas just to get everything explorer-safe. Back to the fireplace: Piper got the ball rolling by surfing high and low for some design ideas on other bloggers' renovations. It's pretty inspiring to see other handy (and no-so-handy) people take their homes in their own hands. handy hands not so handy. hands. Let's continue...
Lately I've been motivated to get things done aroound the house because once lil' Zbear starts walking everywhere all bets are off. She's already starting to become mobile with her military-style belly crawl so there's this unknown deadline for some of our major renovation ideas just to get everything explorer-safe. Back to the fireplace: Piper got the ball rolling by surfing high and low for some design ideas on other bloggers' renovations. It's pretty inspiring to see other handy (and no-so-handy) people take their homes in their own hands. handy hands not so handy. hands. Let's continue...

This is what it looked like before we started. You can see Piper painted a few sample colors to get a taste. There's Zoey overseeing the project as the safety and QC manager. Actually, she's probably thinking "if that piece of crown moulding falls on my head you are officially a terrible father". Luckily it didn't, still unofficial.


After batting around a million different ideas on how to proceed, I took the plunge with 3/4" MDF board, selected for it's "finishability". Zoey's favorite Uncle Daweh came over for an afternoon and helped me cut the big pieces. As always when the two of us get together it's an adventure and/or a disaster in the making. Thankfully our fun-o-meter stayed at "adventurous" and there were no ER trips this time. Anyway, we were able to cut the first few pieces and fasten them to the old brick with liquid nails and countersunk concrete/masonry screws. We initially tried mitreing the corners but found that way beyond our skill level. In case you're wondering how I finished the rough edge, I skimmed it with wood filler and sanded it using a painter's sanding block. Just in case you were wondering.


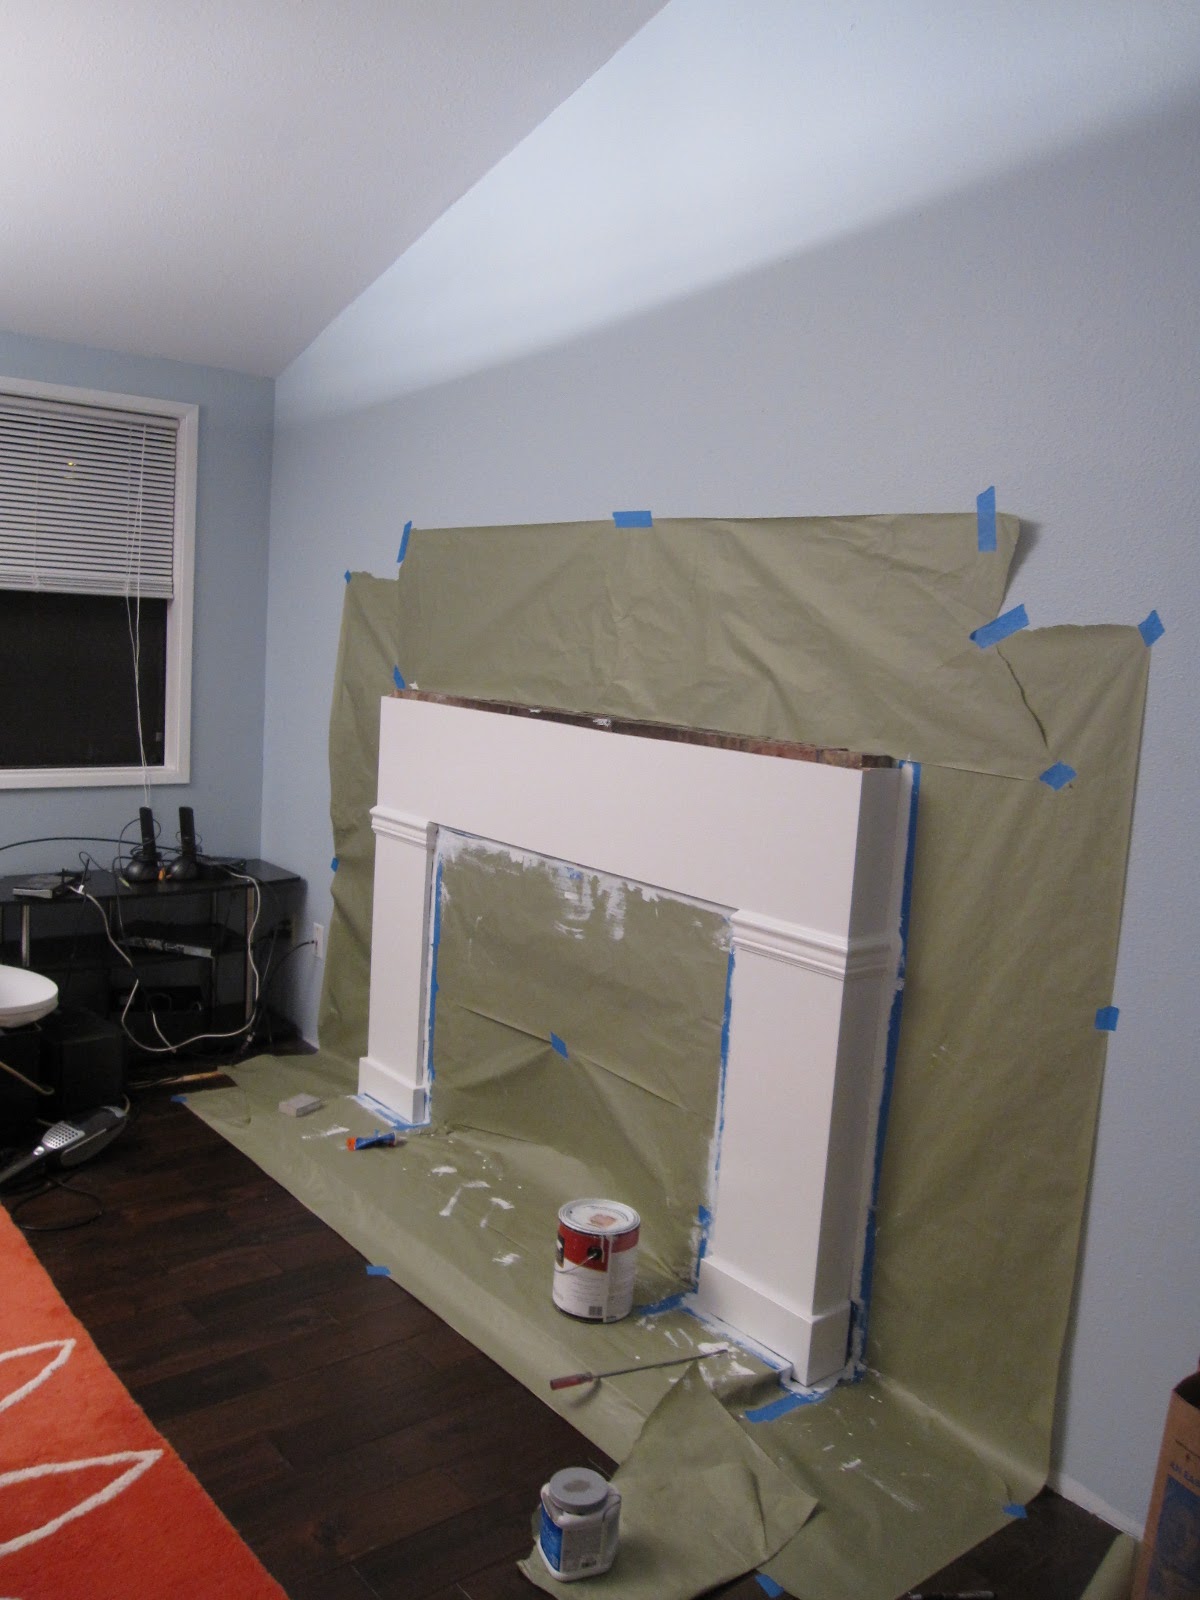
After letting the liquid nails set for 24 hours, I attached some chairrail for a false column look and primed the MDF. Piper pitched in and helped paint the existing exposed brick. I don't know if she was sick of studying or sick of staring at my butt crack while I squatted. See the green mini-chair? Yeah, I'd break that.

A fireplace is not a fireplace unless it has a mantel. Piper and Zbear accompanied me to Home Depot to pick a good piece of crown to use and of course Piper picked the real wood dental mould only the most expense ($5/lf)! All along the desire was to hide the TV cables as much as we could from view. To do this, I wanted to have a removable mantel that would encase the wiring and transition to surface-mounted cable raceway from the center of the mantel up to the TV for a clean look. I had a ton of difficulty figuring out the geometry of the crown and making sure it was mitred correctly on the saw. It definitely took a few tries but eventually I got it and again used liquid nail, finish nails, and some support braces from leftover MDF board to fasten everything.

Once I installed the base trim (the same trim to be used on the adjacent walls), I finish painted! I didn't want to drag the paint sprayer and create a huge mess for such a small surface area so I bought a handheld 2-quart sprayer. Big mistake. The sprayer was useless as it continually clogged with just standard latex paint even though I specifically bought the one that advertised no thinner needed for regular latex and even strained my paint first. I decided that a small 6" thin roller would work just fine and it turned out pretty well. It took 4 thin coats to get an even texture/sheen. When I remodel downstairs and add paneling, I'll buy a finish sprayer tip and use the big sprayer. Oh! The picture to the right shows where the cables will be hidden as it travels from the entertainment unit, up the side of the fireplace, under the mantel and to the TV.
After that I installed all the parts and pieces to wall-mount our TV. Amazon is awesome, so is monoprice.com. Why spend $50+ for each AV cable at a local big box store when you can get the same exact thing for $10 online, shipping included? No wonder Office Max, Office Depot, etc are going out of business. Anyway, here it is in it's current state:

Finished at last (sort of). It took about 2 weeks off and on. If I had everything ready and worked everyday, this project probably would have taken 4-5 days, mostly to make sure all the glue and coats of paint cured properly. Eventually my plan is to build a screen out of cleaned and clearcoated logs to add some color/texture so it doesn't seem so sterile and robotic. All in all I'm pretty happy with the outcome as it was a first time endeavor and so many things could have gone wrong! Now, onto the next project...
so proud of you honey! thanks for mentioning my name so many times - it makes me feel i've contributed quite a bit ;)
ReplyDeleteI have no clue what you were talking about in 99% of this post but I am proud of you, thoroughly impressed that you did this despite having to wake up at 3am for work, and got it done so quickly. It looks awesome!
ReplyDeleteOh where is our old old house? I can't even recognize it anymore.
ReplyDeleteI'm proud of you, Gare.
Why haven't I seen this before? All this time I've been trying to decipher the Piper's Chinese blog. Thank goodness you write English Gary. Except, I (like Connie) don't know what anything means...maybe I should stick to the Chinese version.
ReplyDeleteHey Gare,
ReplyDeleteI appreciated the detailed explanations. Excellent job, especially impressive as it was your first try!
Monoprice is a cheap geek's dream come true. :-P Glad you found it!
Your place looks like a new home! Congrats both of you!